Build a Cartoon in 6 Steps
By Leslie Carrier
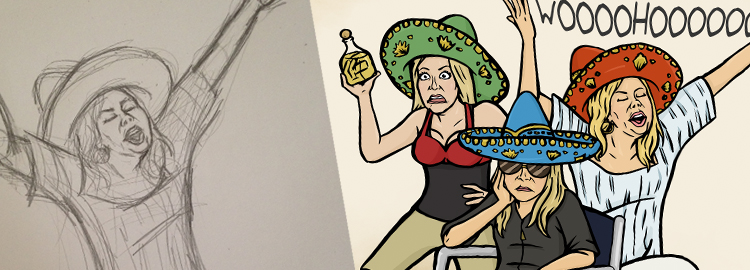
Making a new cartoon for me involves a combination of both traditional and digital art techniques. It starts off with the classic pencil on paper drawing, inking by hand, then followed by coloring digitally. I’ll step through the process of creating this Real Housewives of Orange County cartoon:
1) Draw some practice sketches
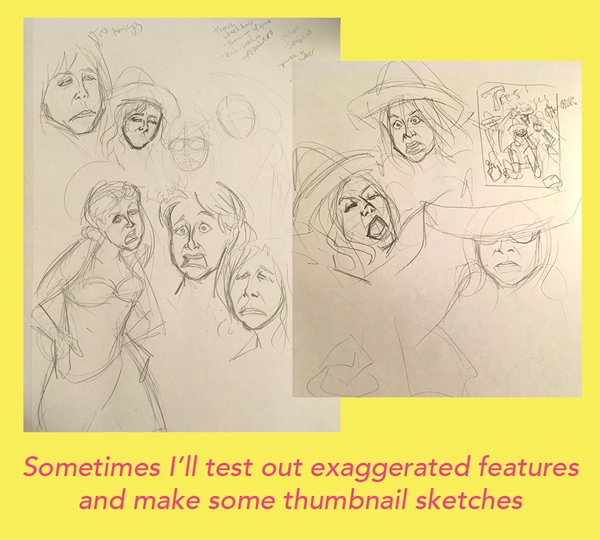
This is where I open up my sketchbook and practice drawing an exaggeration or likeness of a subject. I test out various facial expressions and compositions.
2) Draw each component
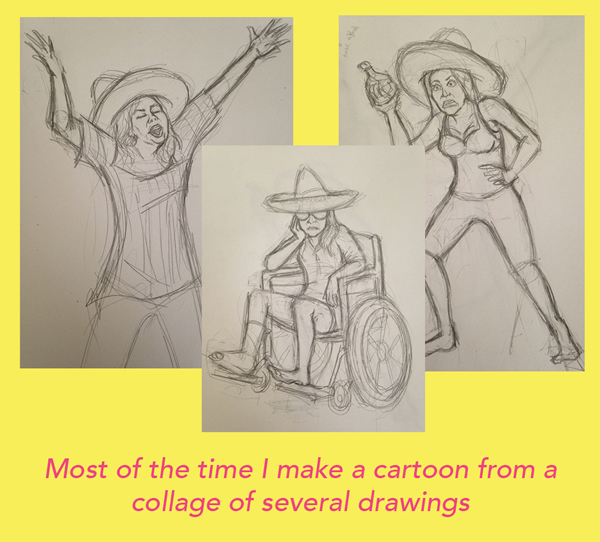
Usually my cartoons are a composition of various drawings collaged together. If my cartoons involve multiple figures, I prefer to draw them all separately in order to allow more control of the layout. It also allows me to draw the figures much larger rather than trying to squeeze them all down together. I use a regular HB pencil and sketchbook paper to draw everything.
3) Ink and scan in the computer
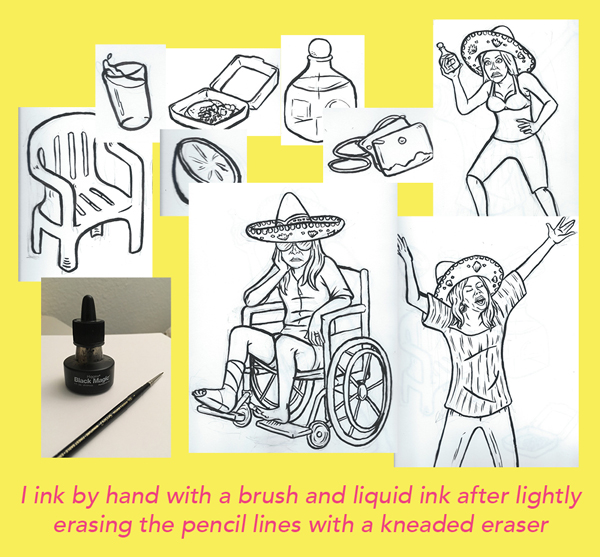
Once I’m happy with all of the pencil drawings, I move on to inking. I use a kneaded eraser to create a ghost image of the drawings by lightly rubbing them with the eraser. I pour some India ink into a high tech ink receptacle (a bottle cap) and get to work with a small brush. If you ever make a mistake, good news! When your inked images are scanned in the computer, you can clean it all up in Photoshop.
4) Convert line art to a vector
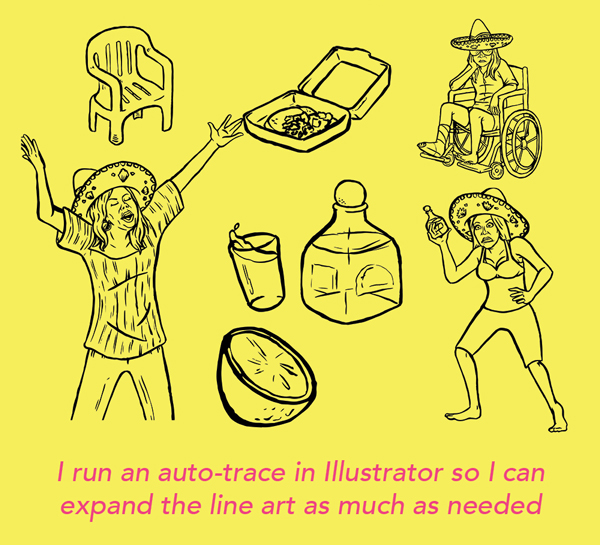
I scan all of my inked drawings into the computer and heighten the contrast in Photoshop before importing them to Illustrator. In Illustrator I make my lines into vectors by using the Auto Trace tool and clicking the “Ignore White” checkbox. I convert the line art into a vector so that I can scale up the image as large as I need when I export it as a PNG to color in Photoshop. It’s also fine to just color everything in Illustrator, but I prefer converting it to a rasterized image for Photoshop to speed up the process.
5) Clean up line art and color
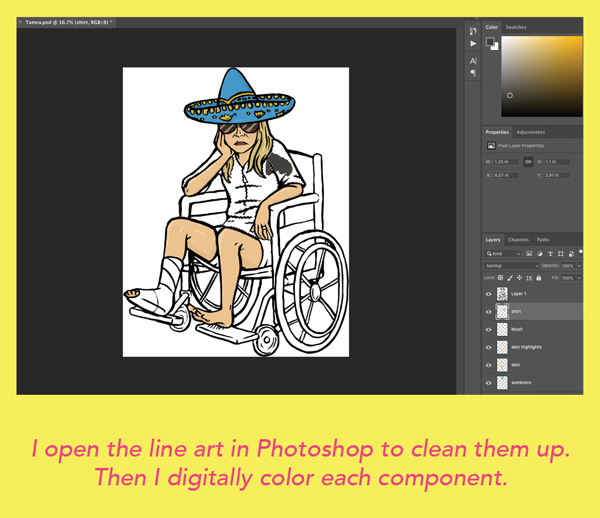
Once all images are exported to PNGs, I open them in Photoshop and clean up my lines with a lot of erasing and retouching with the Brush Tool followed by coloring. Each color is separated by an individual layer in case I need to edit it later.
6) Collage
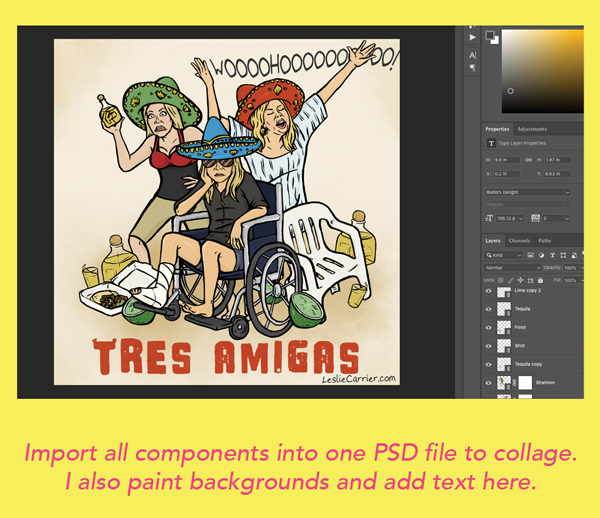
After coloring and completing each drawing component, I move on to collaging all of them in one file. I use File -> Place Linked to import the individual components of the drawing. This is where I also work on the background and overall design of the layout. Export it for web and it’s ready to post online!
Thank you for checking out my cartoon-making process! Check out my Instagram page for more cartoons!